Who this guide is for
People who are avoiding cleanup because the emotional risk feels higher than the storage benefit, especially in family, travel, and milestone-heavy libraries.
 SwipeWipe
The safest way to clean up your iPhone photos is not to start with your favorite albums. Start with low-risk clutter like duplicates, screenshots, similar shots, and oversized videos so cleanup feels controlled from the beginning.
If you want the product workflow, open the storage page first. If your main concern is one clutter type, switch to the matching product page below.
People who are avoiding cleanup because the emotional risk feels higher than the storage benefit, especially in family, travel, and milestone-heavy libraries.
It prioritizes low-regret categories first: screenshots, exact duplicates, similar-shot review later, and month-by-month pacing instead of one giant purge.
Updated April 15, 2026 to keep the guide aligned with the current storage, duplicate, screenshot, and similar-photo product routes on the site.
If you want to clean up iPhone photos without deleting important memories, move in this order: screenshots, exact duplicates, similar shots, then storage-heavy videos. That sequence removes clutter first and saves emotional decisions for later.
Old screenshots and throwaway saves are usually safer to remove than real photos from trips, family moments, or milestones.
Deleting copied or repeated versions is one of the lowest-risk ways to create space while keeping the real keeper.
When several photos capture the same moment, choose the best one first and delete around that choice.
A timeline-based pass is easier to trust than one giant cleanup binge across your whole camera roll.
People rarely avoid cleanup because they do not care. They avoid it because every delete decision can feel like a tiny bet against future regret.
Your best photos live in the same library as screenshots, downloads, burst leftovers, and accidental repeats.
When your library is crowded, it gets harder to tell the difference between a keeper, a backup copy, and a photo you will never revisit.
Low storage often turns cleanup into a panic task, which is exactly when random deletion feels most dangerous.
The safest cleanup strategy is to remove what you are least likely to miss before you touch meaningful albums or one-of-a-kind moments.
The most helpful cleanup tools do not force you straight into deletion. They show where the pressure is coming from first: overall storage, the timeline, and the main clutter categories that are safest to review.
Duplicate cleanup is safer than it looks when you make the decision in the right order.
Look for the sharpest, best-framed, or most meaningful version before you think about removing anything else.
Group near-identical shots together so you are choosing within one moment instead of jumping across unrelated dates.
Ten good decisions are better than one long session that ends in second-guessing or accidental deletes.
If your goal is to make space fast without emotional risk, these are often the smartest categories to review before anything sentimental.
Most screenshot clutter was meant to be temporary, so removing it often feels cleaner and safer than touching your real photo timeline.
A few oversized clips can reclaim more storage than dozens of photos, especially when they were test recordings or accidental long captures.
Quick wins make it easier to keep going, which matters when you have been avoiding cleanup for months.
Timeline-based cleanup feels lighter because you are dealing with one slice of your library at a time instead of the whole thing at once.
Start where the memories are still fresh enough that keeper decisions feel easier.
Move screenshots, exact duplicates, and throwaway saves out of the way before you touch the harder photo groups.
Choose one or two winners from each cluster and let the rest go only after the keepers are clear.
Ending at the end of a month makes it easier to come back later without losing your place.
Manual cleanup works for small batches. A dedicated app becomes more helpful once the library is large enough that finding the problem takes longer than reviewing it.
A short product walkthrough helps show why a guided workflow feels calmer than manually bouncing around the Photos app.
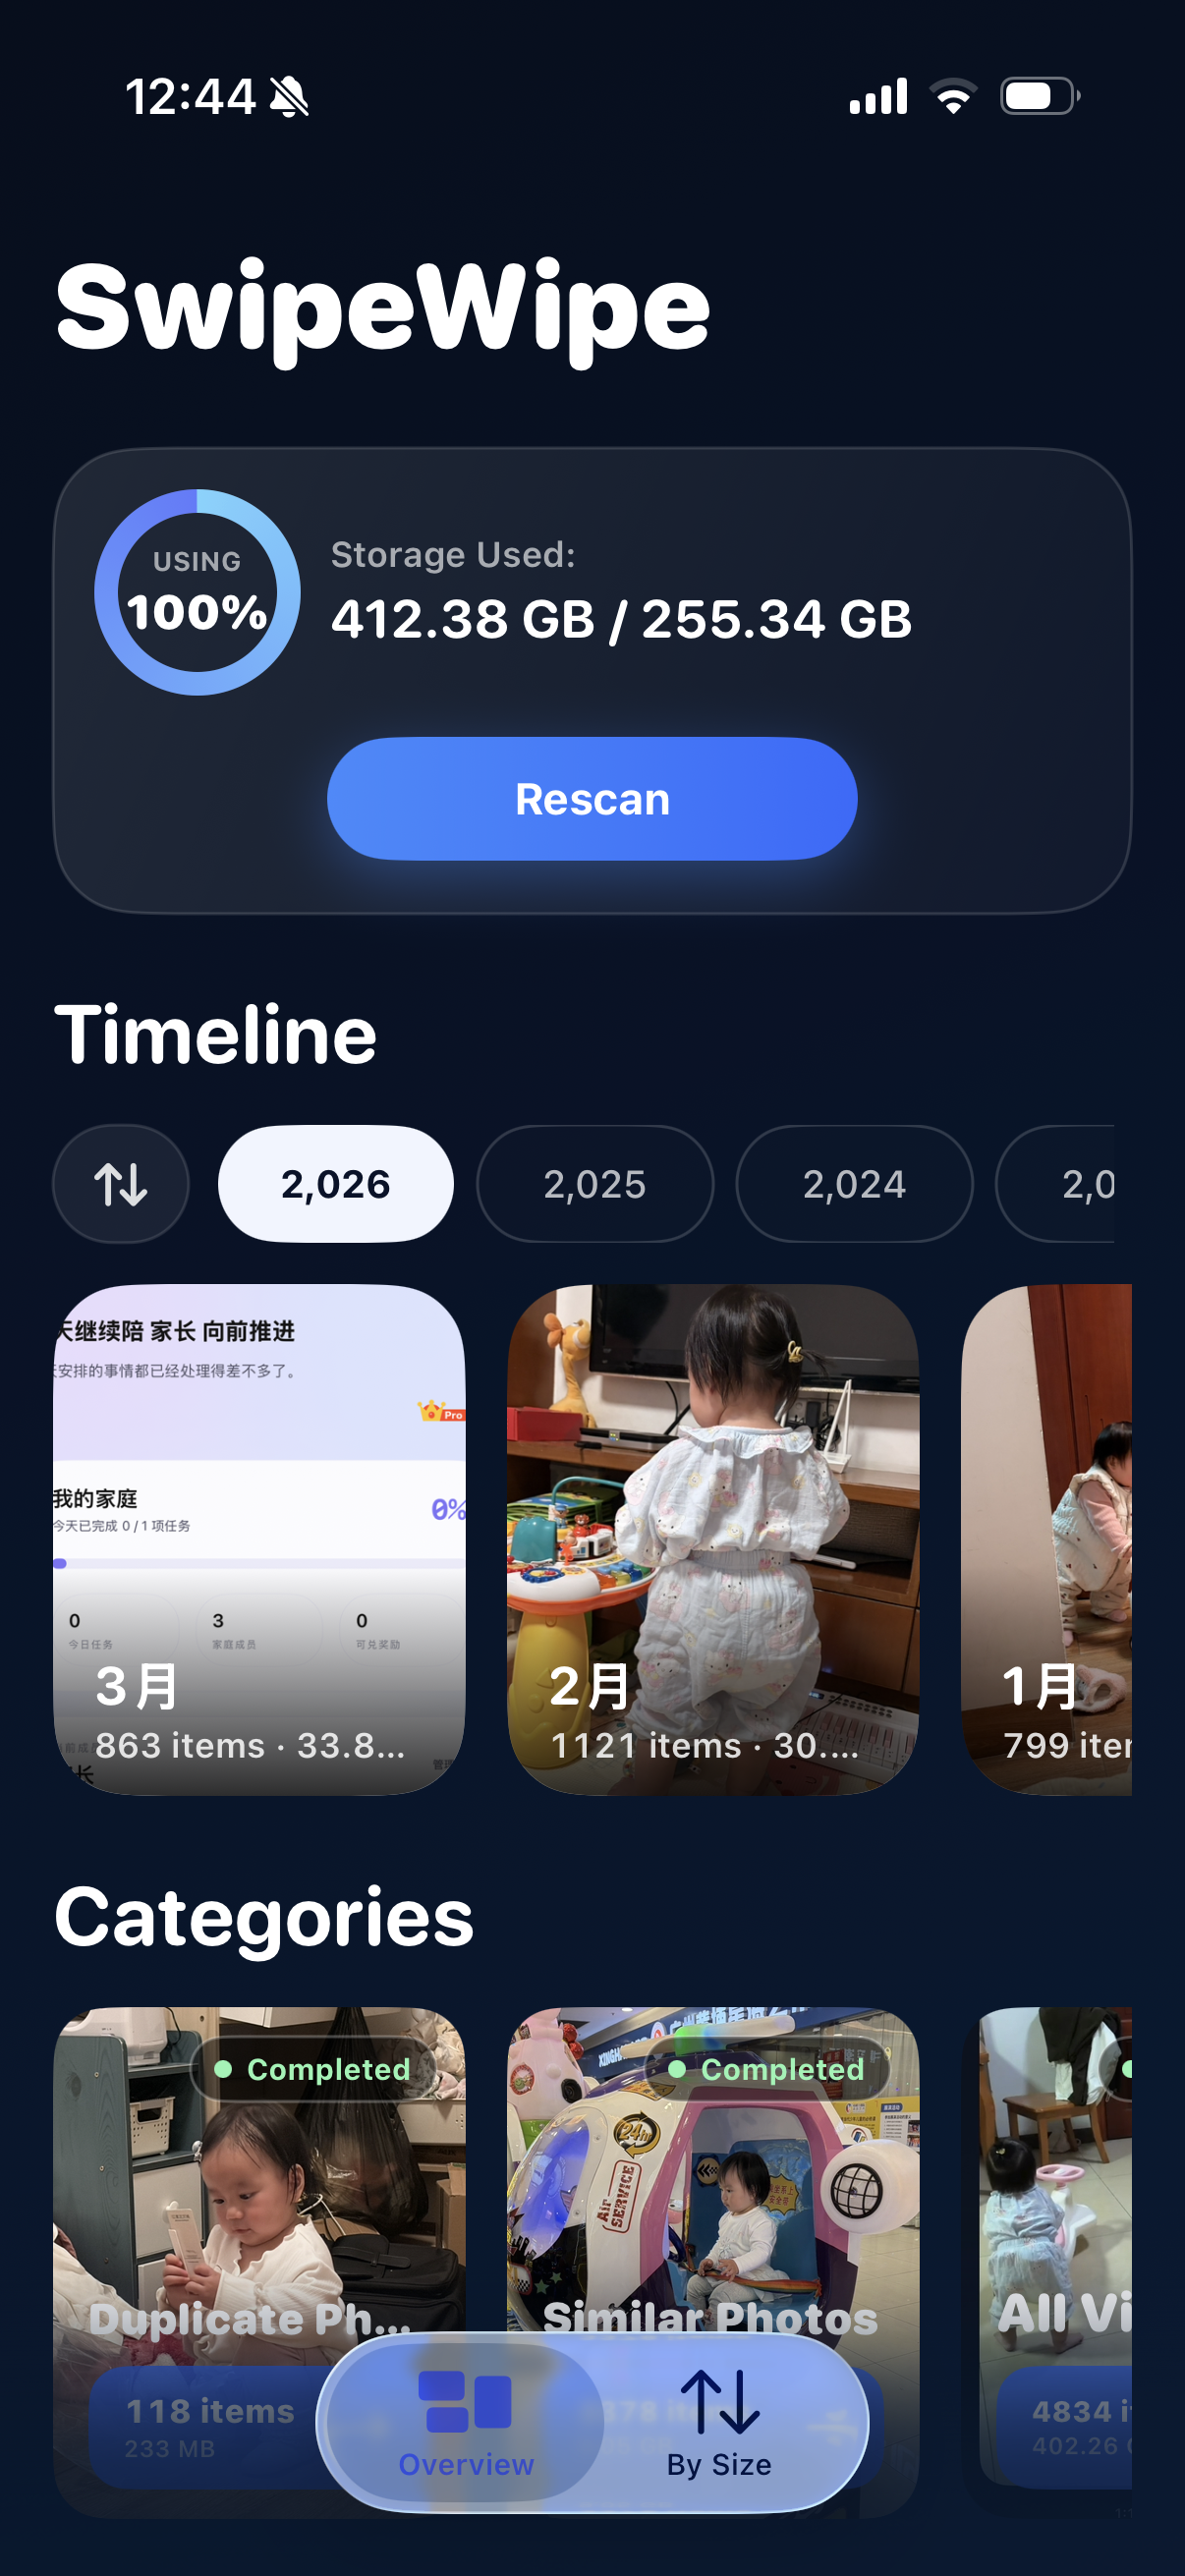
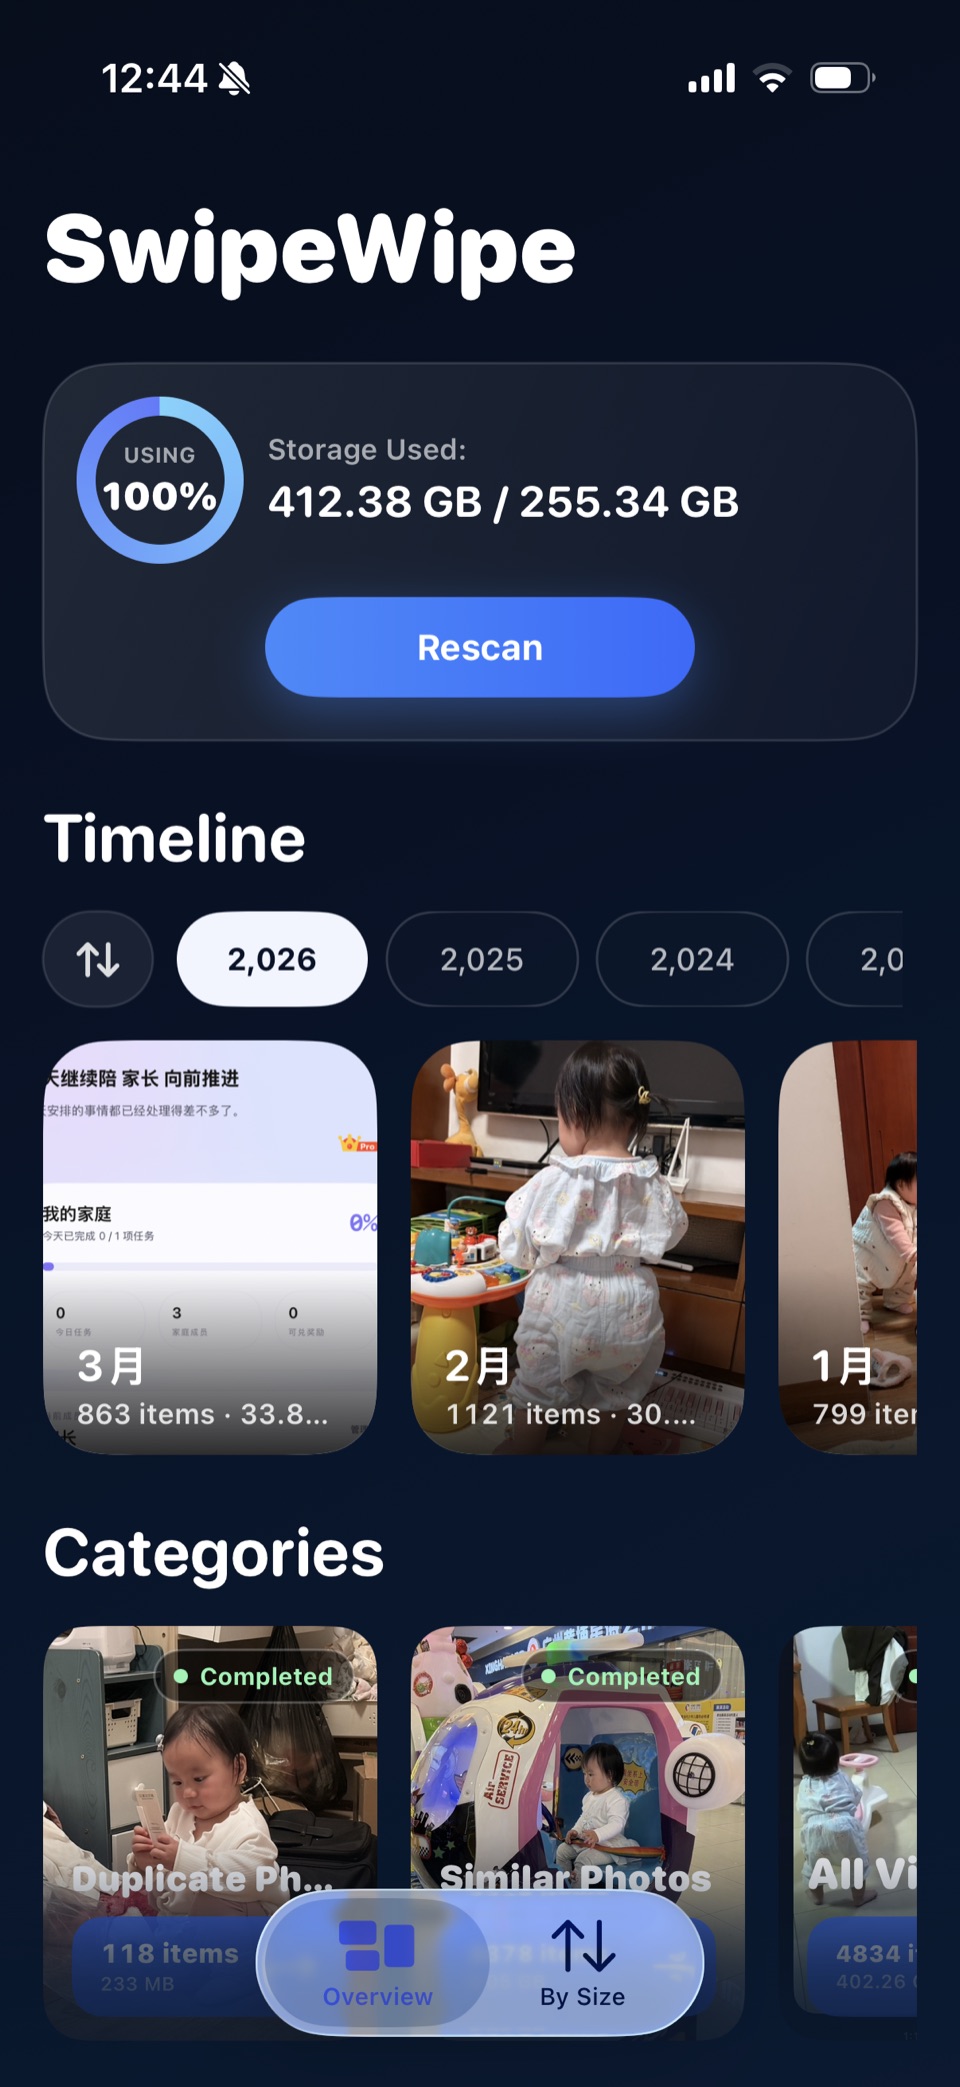
A quick look at the overview and cleanup flow inside SwipeWipe.
See storage pressure, timeline access, and your cleanup categories in one place.
Move into screenshots, duplicates, or similar shots instead of guessing what to delete first.
The flow is meant to make cleanup easier to repeat, not just easier to start.
Screenshots and exact duplicates are usually the safest places to start because they are low-risk and easier to review than sentimental albums.
No. Month-by-month sessions are easier to trust and much less likely to end in fatigue-driven mistakes.
Then open clean iPhone storage, which turns low storage into a practical cleanup sequence.
Yes. The useful ones help surface the right cleanup categories faster while still letting you review before you delete.
Use the page that matches the kind of low-risk cleanup you want to do next.